
Instead of flipping a coin, flip a switch! Ever wanted to make your own Heads or Tails Habbo style? This guide teaches you how!
Note: This wired tutorial is made for ONE section of chairs. You will need to repeat each wired step for your other chairs, depending on how many you decide to have.
Teleport Collision:
1 x Wired Trigger: User Stuff Collision
1 x Wired Effect: Teleport To Furni
Game Wired:
11 x Wired Effect: Match Furni To Position & State
6 x Wired Condition: Furni States and Positions Match
4 x Wired Trigger: Repeat Effect
2 x Wired Trigger: Furni State Is Changed
2 x Wired Condition: Furni Has Users
2 x Wired Condition: Triggering User Is On Furni
2 x Wired Add-On: Random Effect
2 x Wired Effect: Change Furni Direction
1 x Wired Trigger: User Walks On Furni
2 x Switch
2 x Gate
2 x H Alphabet Block
2 x T Alphabet Block
You can layout your room however you like but your game area should be similar!
You will need to stack furni items in the air so people can not walk and can only pass through the gates in the game area and on the rollers.
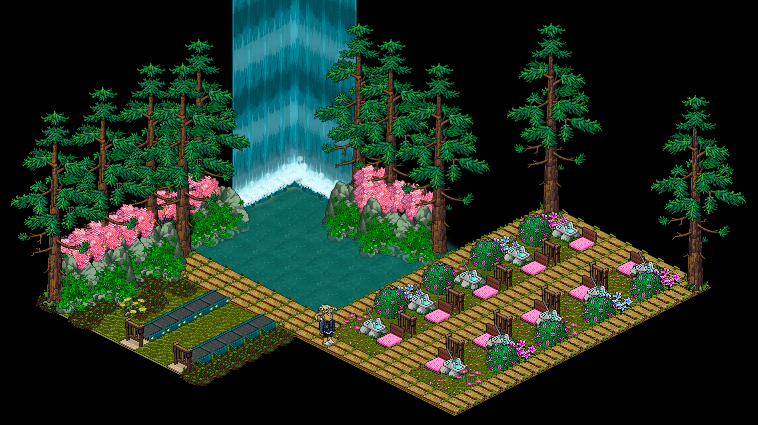
We will only be using the FIRST row of seats for these steps.
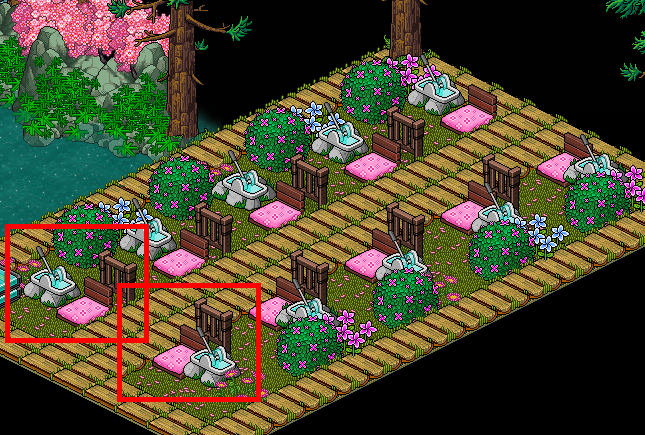
Set your Wired Trigger: Furni State Is Changed to the left side switch.
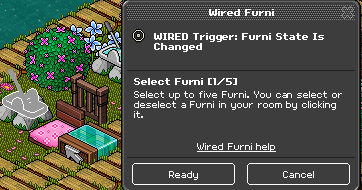
Get your second Wired Trigger: Furni State Is Changed and set it to the right side switch.
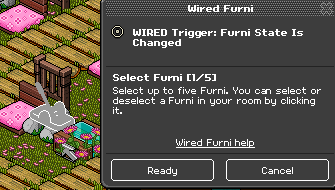
Put your H’s in the position you want them to be when a player flicks the switch; this is where they will land.
Put a Wired Effect: Match Furni To Position & State on top of your left side Wired Trigger: Furni State Is Changed, select the left side H and select Current Direction and Current Position in room then select ready when you have done the above.
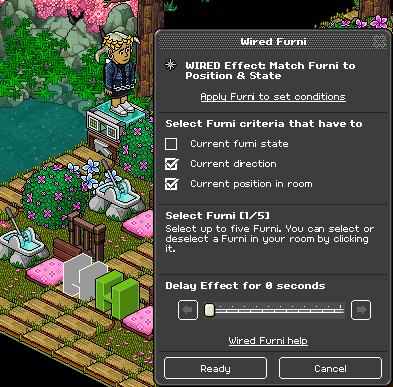
Now time for the right side! Put a Wired Effect: Match Furni To Position & State on top of your right side Wired Trigger: Furni State Is Changed, select the right side H and select Current Direction and Current Position in room then select ready when you have done the above.
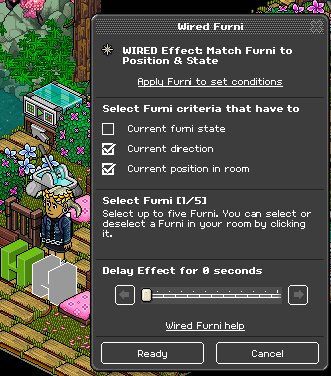
Now it is time for your T’s. Place them in the same position you placed your H’s. Put a Wired Effect: Match Furni To Position & State on top of your left side stack, select the left side T and select Current Direction and Current Position In Room then select ready when you have done the above.
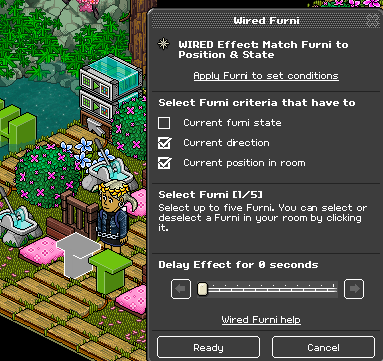
Time for the right side! Put a Wired Effect: Match Furni To Position & State on top of your right side Wired Trigger: Furni State Is Changed, select the right side H and select Current Direction and Current Position in room then select ready when you have done the above.
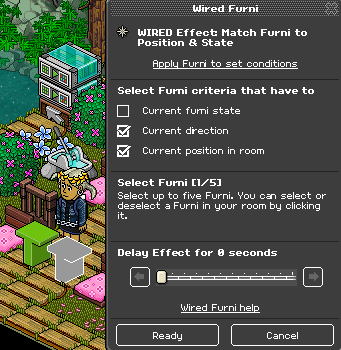
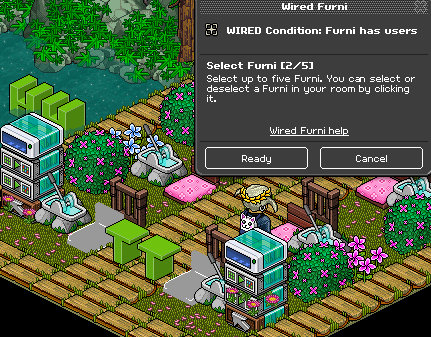
Time to move onto your chairs. Place your Wired Condition: Furni Has Users on both of the stacks as shown below and in each one select both chairs then click ready when you have done so.
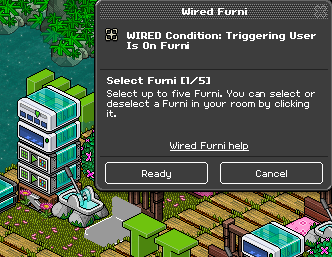
Get your Wired Condition: Triggering User Is On Furni and select the left-hand side chair and place it on your left-hand stack once you have clicked ready and are done.
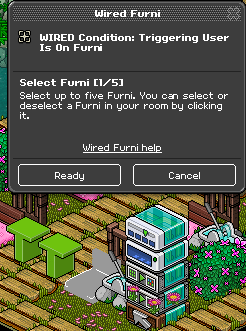
Get your other Wired Condition: Triggering User Is On Furni and select the right-hand side chair and place it on your right-hand stack once you have click ready and are done.
Now it is time to make an area out of the way so you can place your wired and H’s & T’s. Move your H’s & T’s you used from Steps 3-6 to this section.
Note: You can only change your floor plan if you have Builders Club.
The different positions of the H and T are to show you which stack is the left/right hand side.
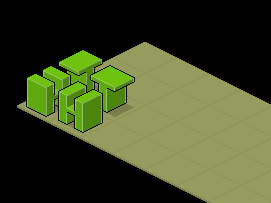
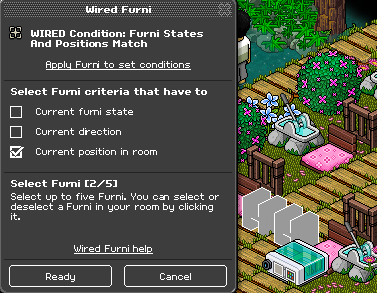
Place a Wired Condition: Furni States and Positions Match on top of your left-hand stack, select current position in the room and select the H & T that is wired to the left-hand side stack. Click ready once you have done so.
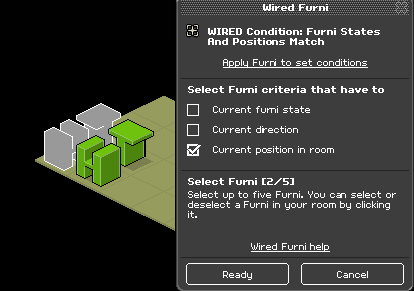
We will now do the same but for the right-hand stack. Place a Wired Condition: Furni States and Positions Match on top of your right-hand stack, select current position in the room and select the H & T that is wired to the right-hand side stack. Click ready once you have done so.
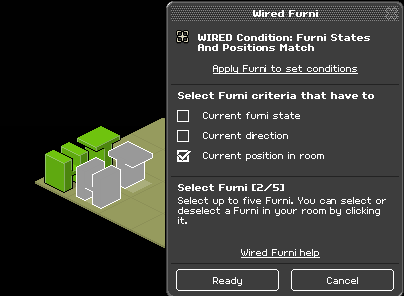
Grab your 2 x Wired Add-on: Random Effect and place one of them on the left-hand side stack and the other on the right-hand side stack.
This wired stack is now complete! You can move this stack to your wired area.
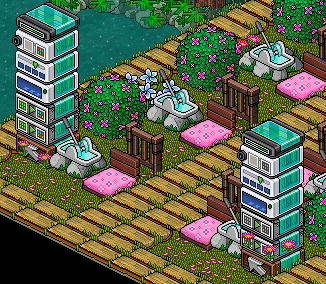
Grab the T’s you have been using from steps 3-6 and step 10-11 and place them in the same position in the game area as before. Place down a Wired Condition: Furni States and Positions Match, select BOTH the T’s and Current position in room then click ready when you have done so.
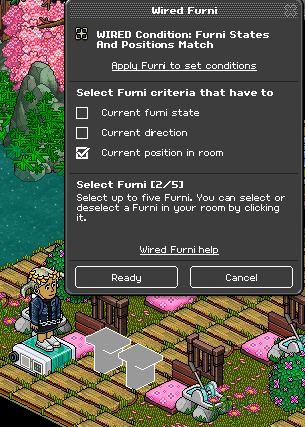
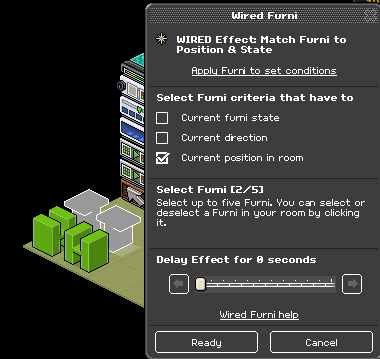
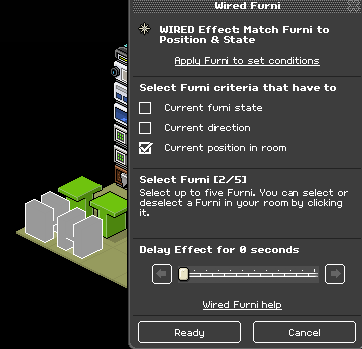
Now put your T’s back up in your out of area spot. Put a Wired Effect: Match Furni to Position & State on top of your Wired Condition: Furni States and Positions Match and select Current Position in room on BOTH the T’s. Once you are done click ready.
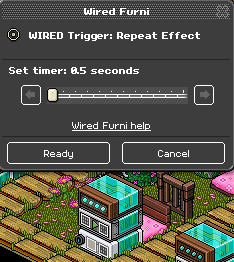
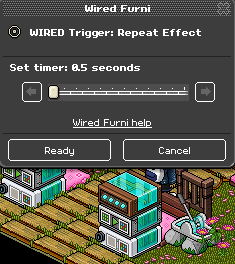
Place a Wired Trigger: Repeat Effect on top of the other wired and set the timer to 0.5 seconds and then click ready once you have done so.
Your stack should look like the one down below.
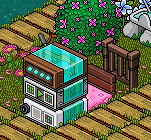
You must now repeat steps 13, 14 and 15 with the H’s.
This stack set is now complete and you can move to your wired area!
Place your left side H and your right side T back in their out of game area position. Put a Wired Condition: Furni States And Positions Match down and select the H and the T and Current position in room. Then click ready once you have done so.
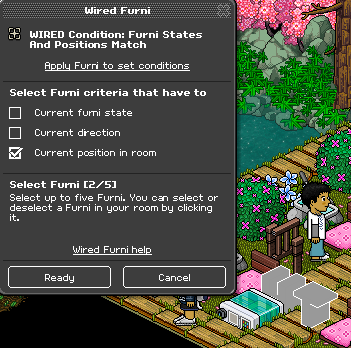
Place your left side H and right side T back into their out of game area. Put a Wired Effect: Match Furni to Position & State on top of the previous Wired Condition, select Current position in room and then click ready once you have done so.
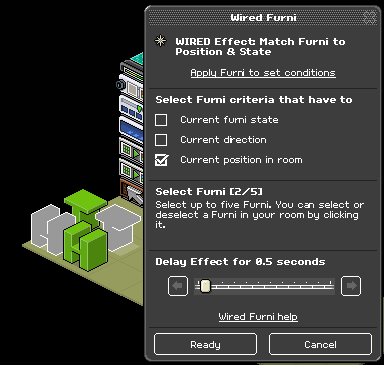
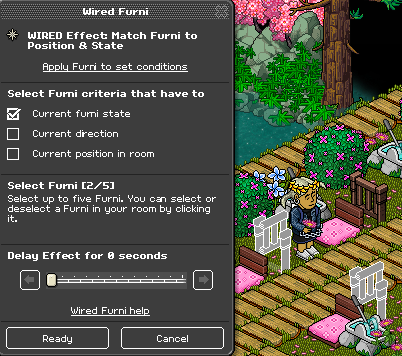
Put down another Wired Effect: Match Furni to Position & State on top of the previous two wireds. Select both 2 gates and make sure they are in the open state, select Current furni state and then click ready.
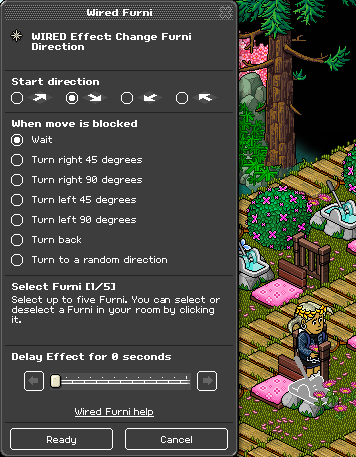
Place your Wired Effect: Change Furni Direction on top of the previous wired. Select your right side switch and make sure the direction you select moves the switch towards the chair! Select the wait button and then click ready once you are done.
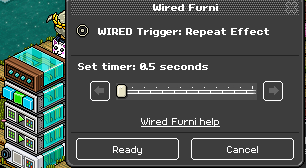
Place your Wired Trigger: Repeat Effect on top of the stack and set it to 0.5 seconds then click ready once you are done.
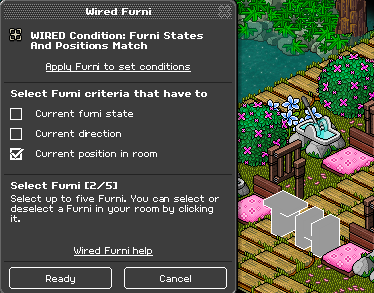
Put your right side H and your left side T in their same positions in the game area. Place a Wired Condition: Furni States And Positions Match down and select the H and T and Current positions in room. Once you have done so, click ready.
Place your right side H and your left side T back in their out of game area positions. Put a Wired Effect: Match Furni to Position & State on top of the previous Wired Condition, select Current position in room and then ready once you have done so.
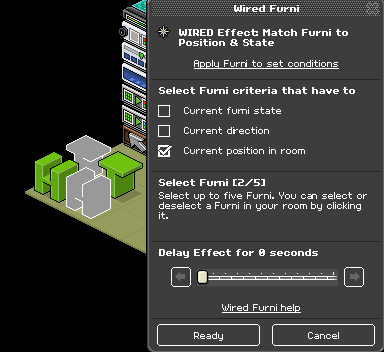
Put down another Wired Effect: Match Furni to Position & State on top of your previous wireds and select your gates and make sure they are in the open state, select Current furni state and then click ready.
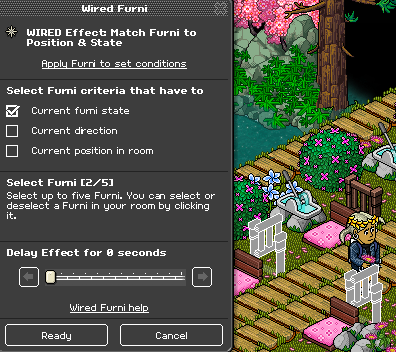
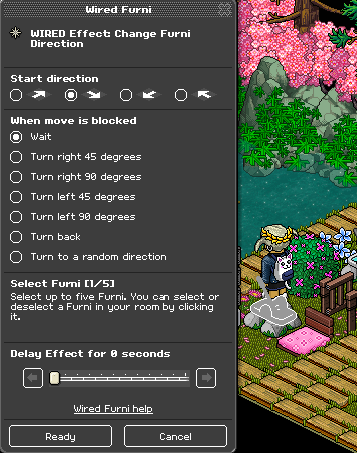
Place your other Wired Effect: Change Furni Direction on top of your previous wired stack. Select your left side switch and make sure the direction you select moves the switch towards the chair! Click the wait button and then ready once you have done the above.
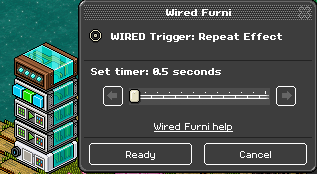
Put down a Wired Trigger: Repeat Effect on top of this stack and set it to 0.5 seconds then click ready once you have done so.
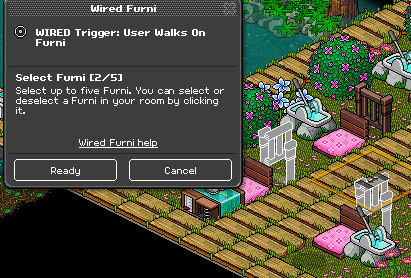
Put down a Wired Trigger: User Walks on Furni and select BOTH of the gates into the next section. Click ready once you have done so.
 <br/>
Place a Wired Effect: Match Furni to Position & State, close the gates and select Current furni state then click ready once you are done. Stack this on top of the Wired Trigger: User Walks on Furni.

Put down a Wired Trigger: User Stuff Collision and a Wired Effect: Teleport to Furni and set the teleport to furni to a place out of the game area.
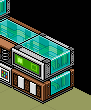
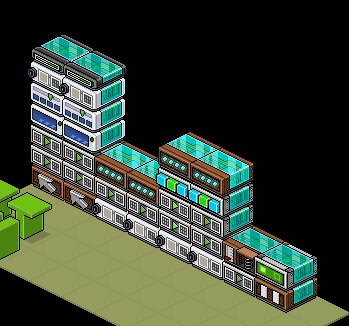
Well done you have now completed one section! Repeat these steps for however many chairs/sections you have!
What You Will Need
Note: This wired tutorial is made for ONE section of chairs. You will need to repeat each wired step for your other chairs, depending on how many you decide to have.
Teleport Collision:
1 x Wired Trigger: User Stuff Collision
1 x Wired Effect: Teleport To Furni
Game Wired:
11 x Wired Effect: Match Furni To Position & State
6 x Wired Condition: Furni States and Positions Match
4 x Wired Trigger: Repeat Effect
2 x Wired Trigger: Furni State Is Changed
2 x Wired Condition: Furni Has Users
2 x Wired Condition: Triggering User Is On Furni
2 x Wired Add-On: Random Effect
2 x Wired Effect: Change Furni Direction
1 x Wired Trigger: User Walks On Furni
2 x Switch
2 x Gate
2 x H Alphabet Block
2 x T Alphabet Block
Room Layout
You can layout your room however you like but your game area should be similar!
You will need to stack furni items in the air so people can not walk and can only pass through the gates in the game area and on the rollers.
Step 1
We will only be using the FIRST row of seats for these steps.
Set your Wired Trigger: Furni State Is Changed to the left side switch.
Step 2
Get your second Wired Trigger: Furni State Is Changed and set it to the right side switch.
Step 3
Put your H’s in the position you want them to be when a player flicks the switch; this is where they will land.
Put a Wired Effect: Match Furni To Position & State on top of your left side Wired Trigger: Furni State Is Changed, select the left side H and select Current Direction and Current Position in room then select ready when you have done the above.
Step 4
Now time for the right side! Put a Wired Effect: Match Furni To Position & State on top of your right side Wired Trigger: Furni State Is Changed, select the right side H and select Current Direction and Current Position in room then select ready when you have done the above.
Step 5
Now it is time for your T’s. Place them in the same position you placed your H’s. Put a Wired Effect: Match Furni To Position & State on top of your left side stack, select the left side T and select Current Direction and Current Position In Room then select ready when you have done the above.
Step 6
Time for the right side! Put a Wired Effect: Match Furni To Position & State on top of your right side Wired Trigger: Furni State Is Changed, select the right side H and select Current Direction and Current Position in room then select ready when you have done the above.
Step 7
Time to move onto your chairs. Place your Wired Condition: Furni Has Users on both of the stacks as shown below and in each one select both chairs then click ready when you have done so.
Step 8
Get your Wired Condition: Triggering User Is On Furni and select the left-hand side chair and place it on your left-hand stack once you have clicked ready and are done.
Step 9
Get your other Wired Condition: Triggering User Is On Furni and select the right-hand side chair and place it on your right-hand stack once you have click ready and are done.
Step 10
Now it is time to make an area out of the way so you can place your wired and H’s & T’s. Move your H’s & T’s you used from Steps 3-6 to this section.
Note: You can only change your floor plan if you have Builders Club.
The different positions of the H and T are to show you which stack is the left/right hand side.
Place a Wired Condition: Furni States and Positions Match on top of your left-hand stack, select current position in the room and select the H & T that is wired to the left-hand side stack. Click ready once you have done so.
Step 11
We will now do the same but for the right-hand stack. Place a Wired Condition: Furni States and Positions Match on top of your right-hand stack, select current position in the room and select the H & T that is wired to the right-hand side stack. Click ready once you have done so.
Step 12
Grab your 2 x Wired Add-on: Random Effect and place one of them on the left-hand side stack and the other on the right-hand side stack.
This wired stack is now complete! You can move this stack to your wired area.
Step 13
Grab the T’s you have been using from steps 3-6 and step 10-11 and place them in the same position in the game area as before. Place down a Wired Condition: Furni States and Positions Match, select BOTH the T’s and Current position in room then click ready when you have done so.
Step 14
Now put your T’s back up in your out of area spot. Put a Wired Effect: Match Furni to Position & State on top of your Wired Condition: Furni States and Positions Match and select Current Position in room on BOTH the T’s. Once you are done click ready.
Step 15
Place a Wired Trigger: Repeat Effect on top of the other wired and set the timer to 0.5 seconds and then click ready once you have done so.
Your stack should look like the one down below.
Step 16
You must now repeat steps 13, 14 and 15 with the H’s.
This stack set is now complete and you can move to your wired area!
Step 17
Place your left side H and your right side T back in their out of game area position. Put a Wired Condition: Furni States And Positions Match down and select the H and the T and Current position in room. Then click ready once you have done so.
Step 18
Place your left side H and right side T back into their out of game area. Put a Wired Effect: Match Furni to Position & State on top of the previous Wired Condition, select Current position in room and then click ready once you have done so.
Step 19
Put down another Wired Effect: Match Furni to Position & State on top of the previous two wireds. Select both 2 gates and make sure they are in the open state, select Current furni state and then click ready.
Step 20
Place your Wired Effect: Change Furni Direction on top of the previous wired. Select your right side switch and make sure the direction you select moves the switch towards the chair! Select the wait button and then click ready once you are done.
Step 21
Place your Wired Trigger: Repeat Effect on top of the stack and set it to 0.5 seconds then click ready once you are done.
Step 22
Put your right side H and your left side T in their same positions in the game area. Place a Wired Condition: Furni States And Positions Match down and select the H and T and Current positions in room. Once you have done so, click ready.
Step 23
Place your right side H and your left side T back in their out of game area positions. Put a Wired Effect: Match Furni to Position & State on top of the previous Wired Condition, select Current position in room and then ready once you have done so.
Step 24
Put down another Wired Effect: Match Furni to Position & State on top of your previous wireds and select your gates and make sure they are in the open state, select Current furni state and then click ready.
Step 25
Place your other Wired Effect: Change Furni Direction on top of your previous wired stack. Select your left side switch and make sure the direction you select moves the switch towards the chair! Click the wait button and then ready once you have done the above.
Step 26
Put down a Wired Trigger: Repeat Effect on top of this stack and set it to 0.5 seconds then click ready once you have done so.
Step 27
Put down a Wired Trigger: User Walks on Furni and select BOTH of the gates into the next section. Click ready once you have done so.
<br/>Step 28
Place a Wired Effect: Match Furni to Position & State, close the gates and select Current furni state then click ready once you are done. Stack this on top of the Wired Trigger: User Walks on Furni.
Step 29
Put down a Wired Trigger: User Stuff Collision and a Wired Effect: Teleport to Furni and set the teleport to furni to a place out of the game area.
Wired Set Up
This is what your wired should look like for ONE section. When you add your other sections you can colour code them using colour tiles or alphabet blocks if you like. Well done you have now completed one section! Repeat these steps for however many chairs/sections you have!
Eevee7 years ago